GUIDELINES
Half Cross Stitch
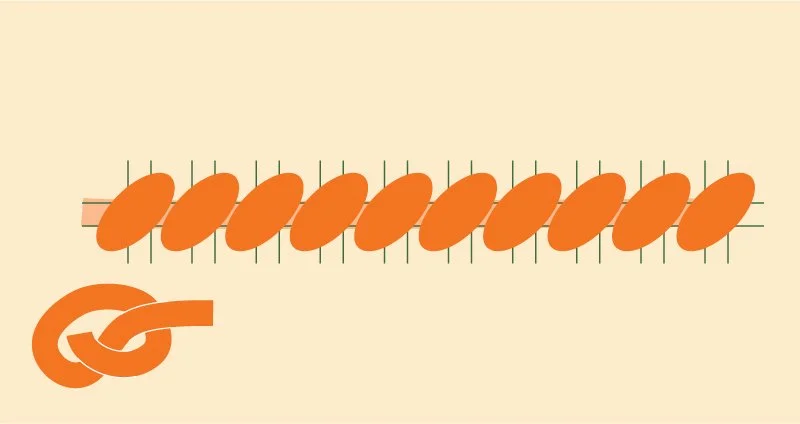
The Half Cross Stitch is the simplest of the tent stitches and perfectly suited to Stitchuation’s canvas density. Its single diagonal stitch creates a smooth, even texture that works beautifully across large and small areas alike. This stitch is highly versatile and forms the foundation for many needlepoint designs, making it the most useful stitch for all of our products.
Because of its simplicity, it allows for quick coverage while maintaining a clean, professional look. The Half Cross Stitch also provides excellent control over thread tension, helping ensure your finished piece is uniform and durable. Whether you’re filling background areas, adding subtle shading, or creating intricate patterns, this stitch is a reliable choice for both beginners and experienced stitchers.
01 Canvas
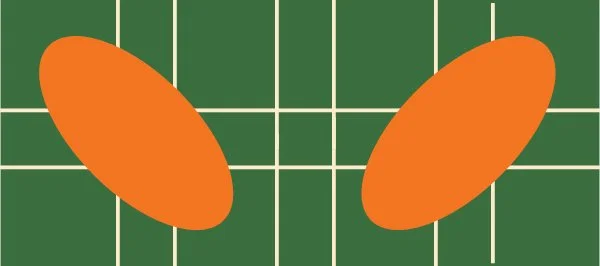
The canvas is made of pairs of threads crossing horizontally and vertically. When stitching, focus only on the larger openings — these are the ones meant for your stitches. The smaller gaps are there to help your stitches cover the area evenly.

02 Stitch Angle
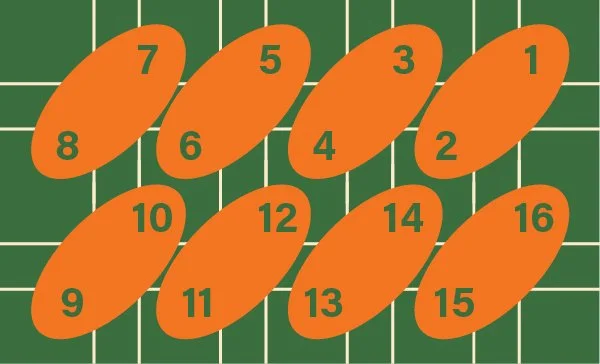
The first thing to decide is the angle of your stitches. We usually stitch from the bottom left to the top right and keep this direction consistent throughout the project. If it feels more natural to you, you can stitch from the bottom right to the top left — the key is to choose one direction and stick with it.
03 Stitching Sequence
Following a proper stitching pattern is essential for a neat Half Cross Stitch. Work your stitches in a consistent direction — for example, if you are moving from right to left, always place each new stitch in front of the previous one, without going backward. This keeps your stitches even and your finished piece smooth and uniform.
Binding Stitch
Binding stitch is used to finish a needlepoint piece by adding a stitched edge. We do that at the very end, when the needlepoint if finished. It is only necessary if you won’t frame your needlepoint. If you plan to frame it, the binding stitch is not required.
You can watch the tutorial video, or follow the illustrated steps below.
A
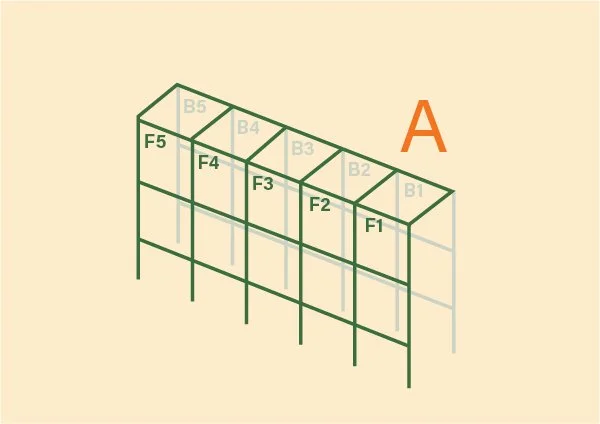
Cut around your finished needlepoint, leaving about 2cm of canvas on each side. Then Fold your canvas so that one row of holes remains at the top, and the next row aligns with the last stitched row of your needlepoint. The back of the folded canvas should be your finished tapestry. In the diagrams, the front holes are marked “F” and the back holes are marked “B.” You will stitch only through the F and B holes—ignore the top row.

B
Start stitching from between the fold, making your first stitch through B1.
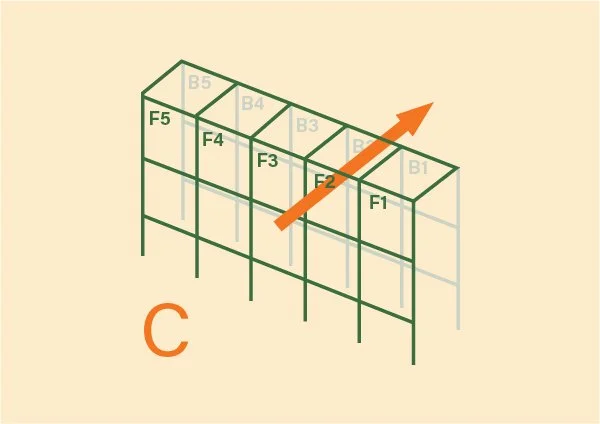
C & D
Make the next stitch through F2 and B2, and the third through F3 and B3.

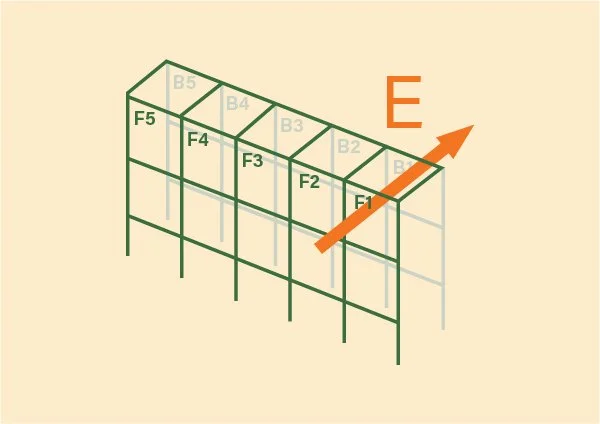
E
Now go back, skip one hole, and stitch through F1 and B1.

F & G
Continue forward to F4 and B4, then return to F2 and B2. Each time you return, skip a hole.

H & I
Next, stitch through F5 and B5, then return to F3 and B3.
J
When you reach the edge of your tapestry, make several stitches through the last holes in the row to cover the corner of the canvas. Then return to Step B and continue along the other edge of your needlepoint.
Patches
You use this technique when stitching your needlepoint directly onto fabric. It works best on sturdier materials, such as denim or canvas, but you can also experiment with other types of garments.
To finish, you’ll need a pair of pliers or tweezers to carefully remove the canvas once your stitching is complete.
01 Attach the canvas
Pick where you want the patch to go. Place the canvas on your fabric and secure it tightly with safety pins. The less the canvas moves, the more accurate your stitches will be.
02 Start stitching
Use the half cross stitch to fill in your patch design. Important: you are stitching through both the canvas and the fabric underneath. Don’t worry – this canvas is temporary. You’ll remove it in step 4.
Try to keep your stitches consistent, and take your time if you’re working with thicker materials. Use the attached blueprint if needed.
03 Rinse the patch
When you’re done stitching, rinse the patch under water. This will dissolve the agent holding the canvas threads together, making them easier to pull out.
04 Remove the canvas
Using a pair of thin pliers or tweezers, start pulling the canvas threads out one by one. Start with either the horizontal or vertical threads — whatever feels easier. Once all the canvas threads are out, your patch will be fully embedded into the fabric. Don’t try to pull more than one at once, that might ruin your final product.
The waste knot is a technique you use only once, at the very beginning, if you want your needlepoint to have a smooth back without any knots. It’s not an essential step, but it makes the finished piece look even more tidy.
Waste knot
A
To begin stitching, first tie a knot on one end of the thread and thread the other part through the needle.

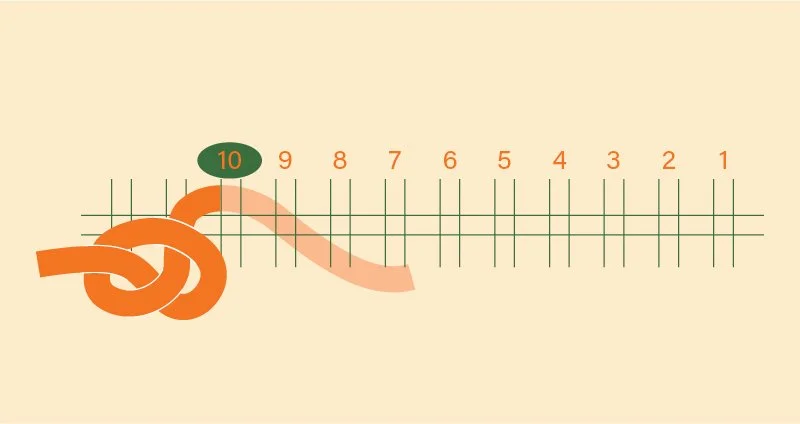
B
Start about 10 stitches away from the corner you’re beginning from, and pull the thread through the canvas so the knot stays on the front side of the canvas.
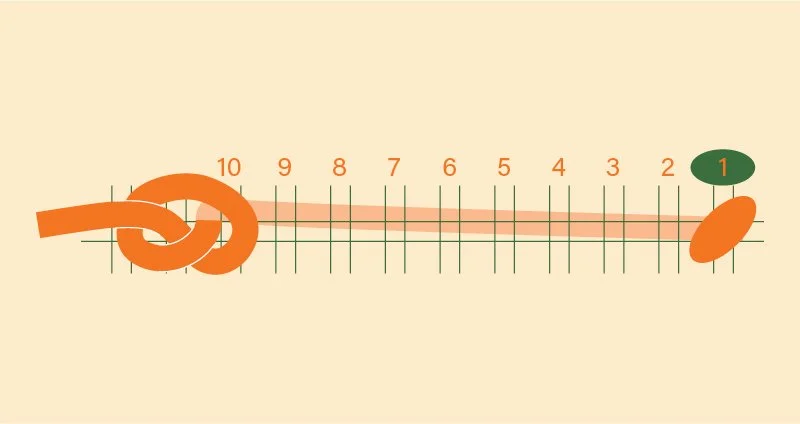
C
Then, return to the beginning of the tapestry and start stitching over the thread between the waste knot and the first stitch. This secures the thread in place. Use the half cross stitch.
D
Once you’ve covered the whole thread from the back, carefully cut off the knot from the front.
Double Binding Stitch
The double binding stitch is used to join your coasters together, making them reversible and neatly finished on both sides. It folds in the extra canvas and connects the two stitched surfaces into double-sided needlepoint. The concept is similar to single binding stitch, so you can check out that tutorial first.